Quantcast
Channel: Twitchy Droid Painting Services
Viewing all 198 articles
Browse latest View live

Farsight Enclave: Riptide with ion blaster

$
0
0
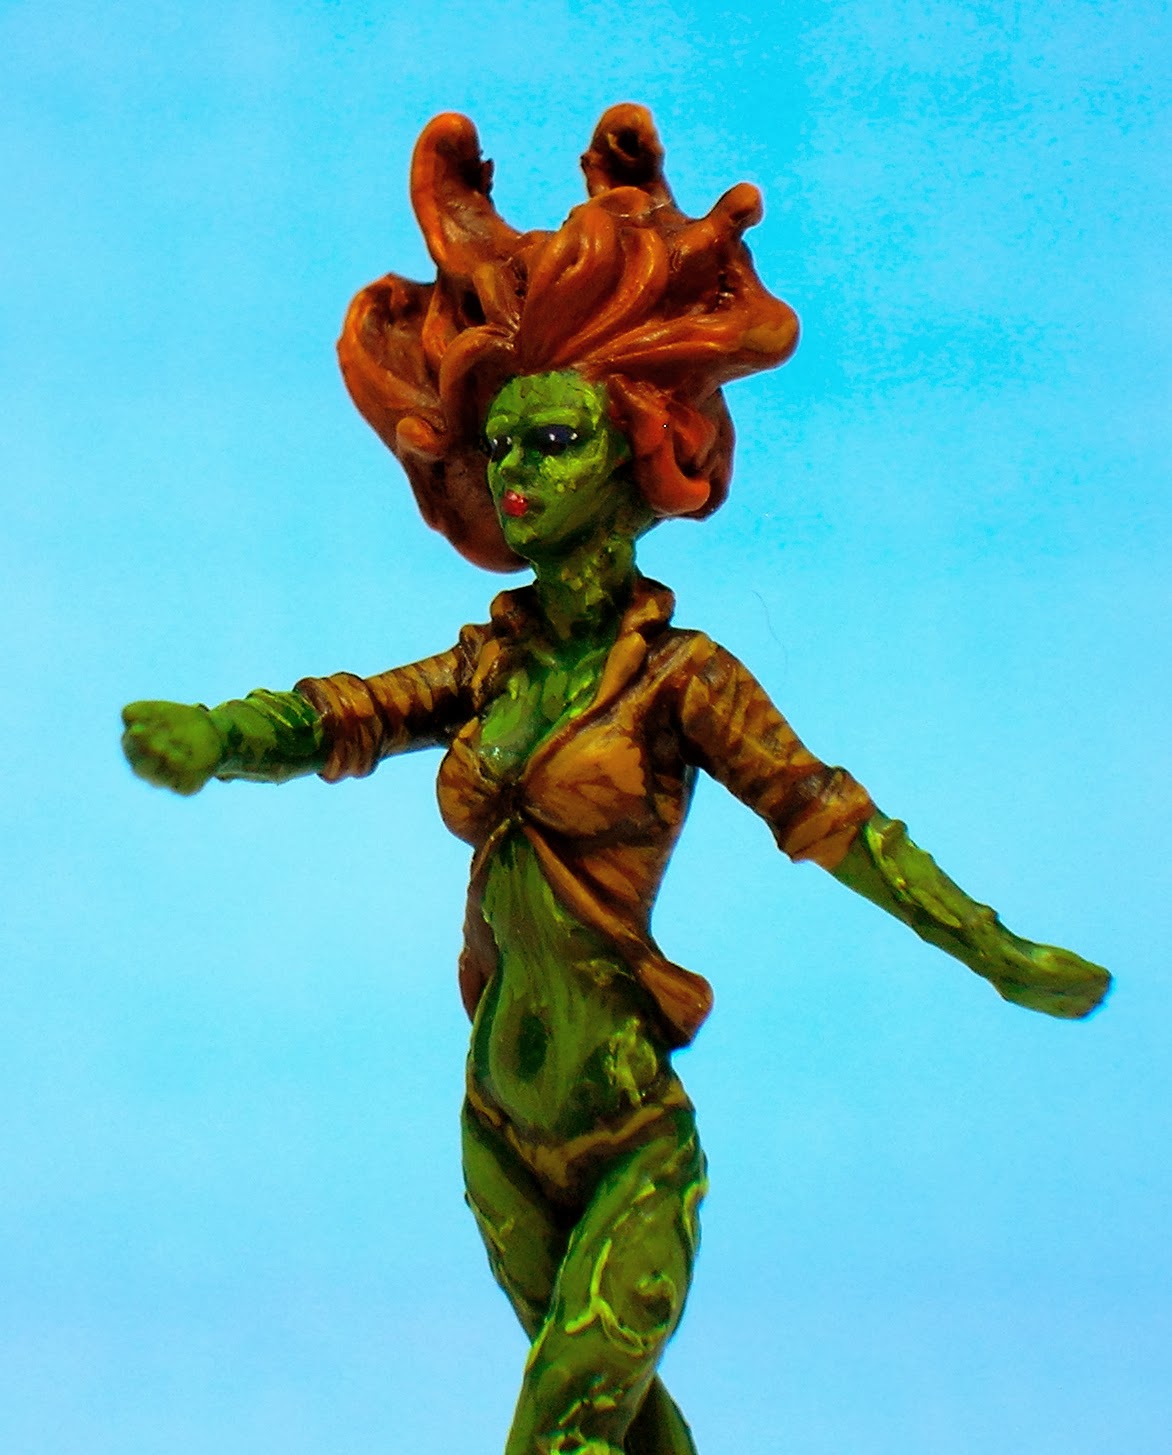
I got this model for Christmas, and have been working on it for some time. It's quite a lot of work to assemble and paint, but this was also a model that I really enjoyed doing! I plan on buying another to complete my Farsight army, but that will have to wait until my model backlog has been dealt with...

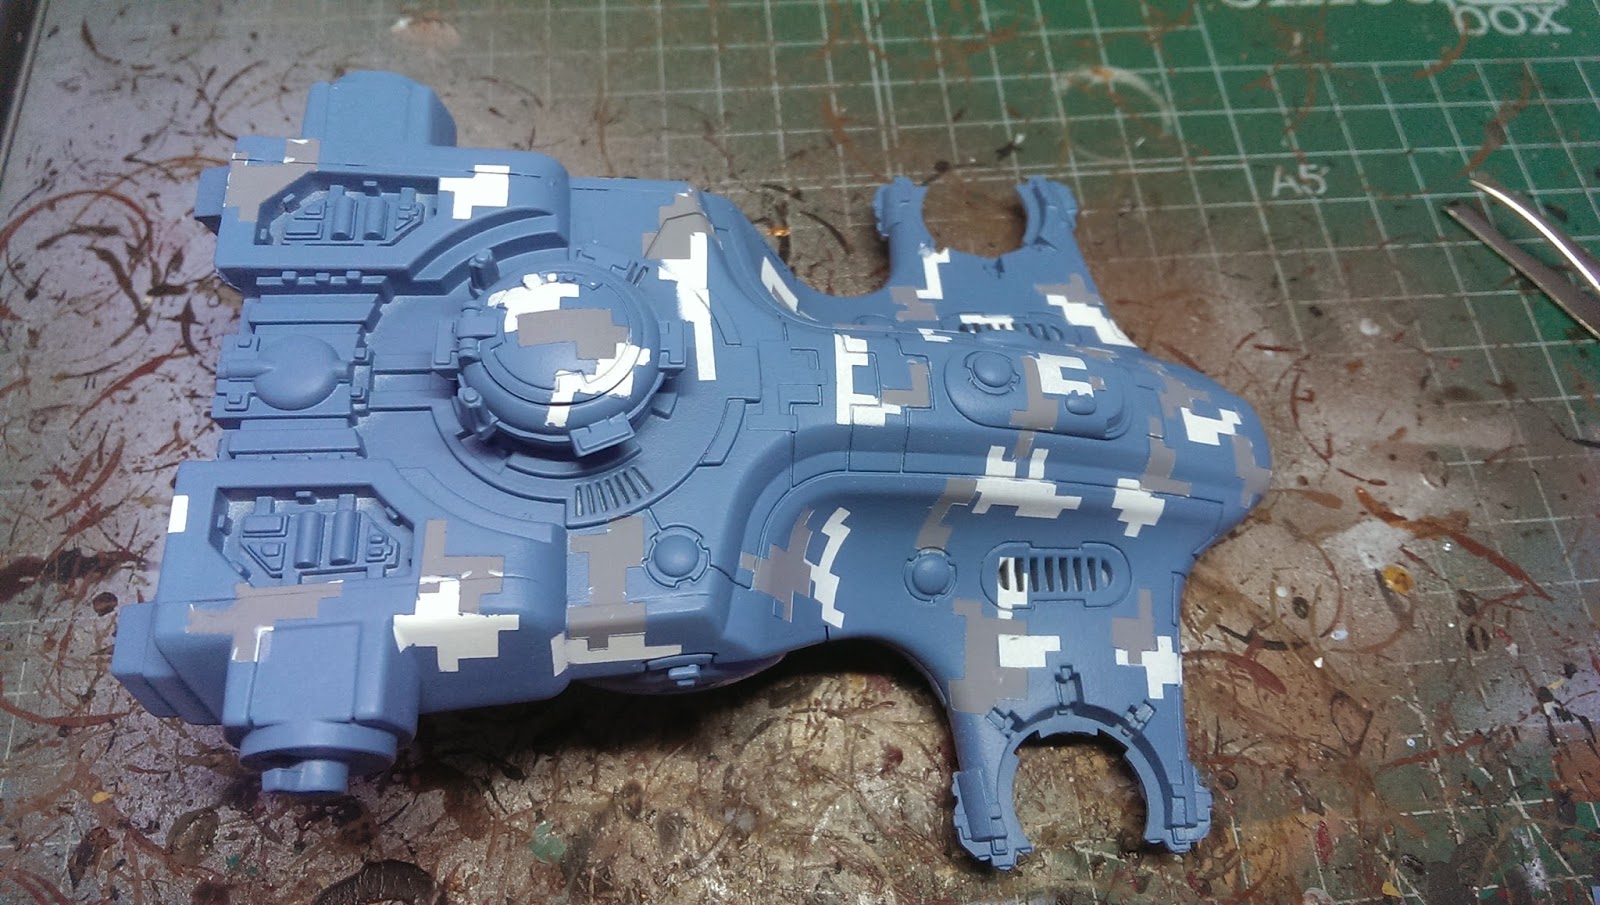
I went with the standard Farsight scheme, using lots of grey panels to break up the armour.


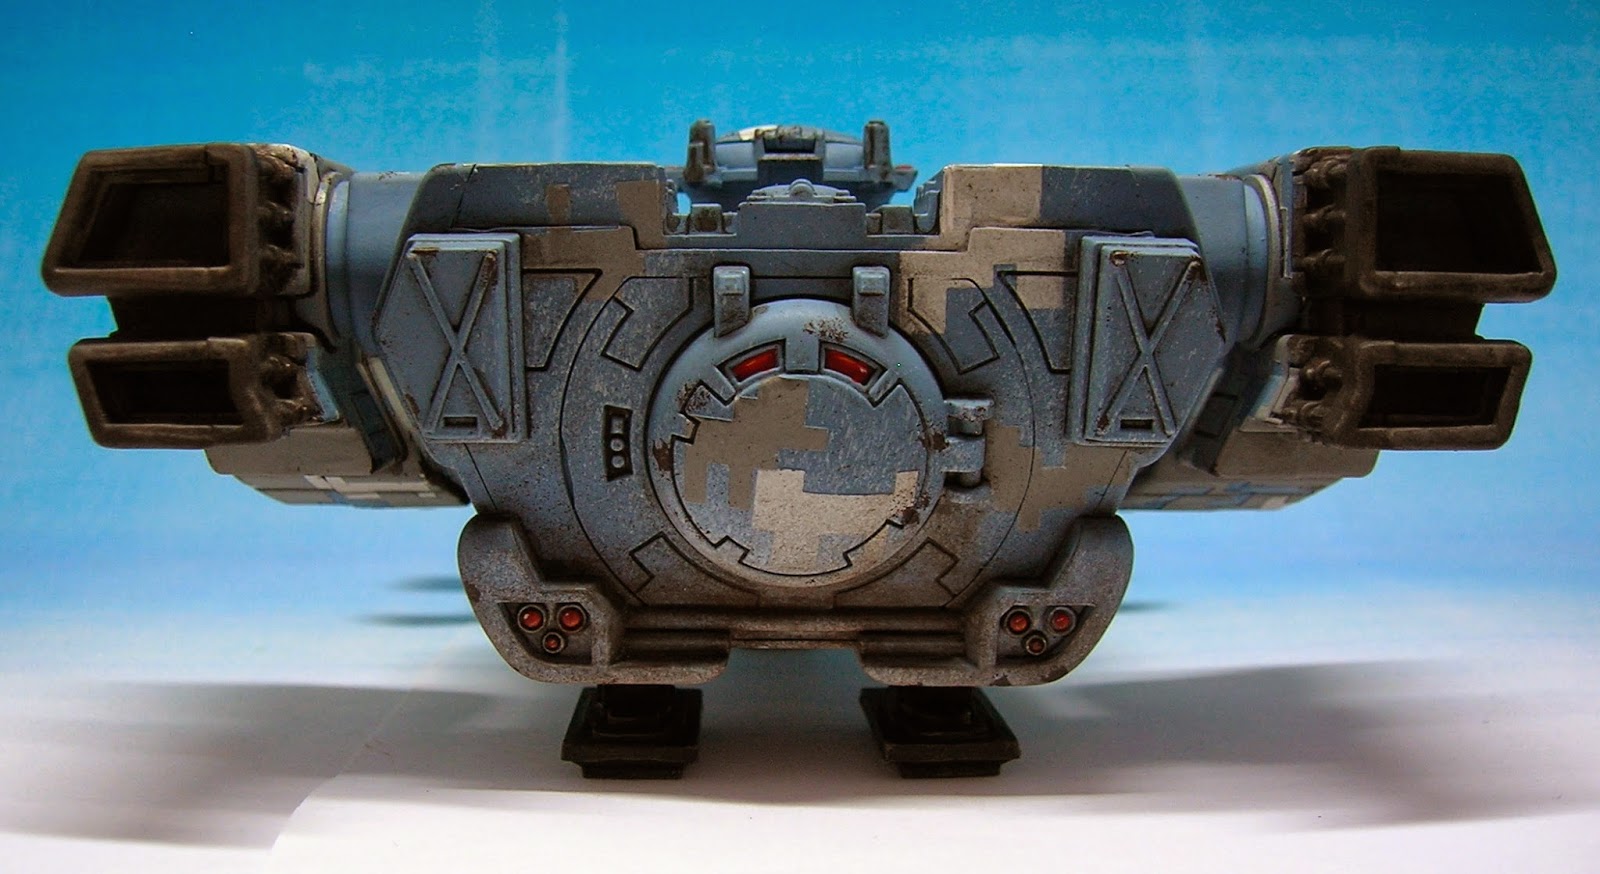
The shield has some extra detail, which I picked out in white, then touched up with back again.


I thought about adding weathering to the jetpack, but ultimately decided to keep the model clean. This is something of a diversion from my typical approach - for larger models I usually go with chipping and weathering.


The might ion blaster: note the additional twin-linked plasma rifles. These can actually be placed on several points, such as the shoulders, the arms, etc.


I decided to paint the head white, because there is an awful lot of red on this model. The lenses were done in the standard Farsight manner - finished off with a dot of gloss.


All in all, a great model - very Pacific Rim! The next one will be armed with a burst canon, for some variety.

Some more Ebay listings....

$
0
0
My January clean-out continues, with the selling of more projects that I've just never gotten around to finishing...

Firstly, some Shapeways "female space marine" conversion sets - these are nicely detailed and will require some modelling experience to put together...

http://www.ebay.co.uk/itm/261388048917?ssPageName=STRK:MESELX:IT&_trksid=p3984.m1558.l2649


Secondly, some resin conversion torso pieces for Imperial Guard...

http://www.ebay.co.uk/itm/261388052582?ssPageName=STRK:MESELX:IT&_trksid=p3984.m1558.l2649


Next some Iron Hands shoulder pads - I'm still doing the Hands, but will be using only decals for the chapter emblem...

http://www.ebay.co.uk/itm/261388050146?ssPageName=STRK:MESELX:IT&_trksid=p3984.m1558.l2649


Finally, an "event only" Forgeworld model - the Death Korps of Krieg Quartermaster model - an awesome miniature, but I can't see myself painting him up (or starting that Krieg army I planned years back!)...

http://www.ebay.co.uk/itm/261388053963?ssPageName=STRK:MESELX:IT&_trksid=p3984.m1558.l2649


Farsight: Drones

$
0
0
My Farsight army requires quite a few drones to bulk out the list, and this was part of the painting process that I was dreading! So many identical models, with annoying detail which just cried out to be highlighted!!!

In reality, this was nowhere near as bad as I thought it would be. I still have several drones to do, but I'll put those off until I get through the remaining battle suits. 

These are two shielded missile drones. I actually liked doing these: the chunky build is easy to paint and highlight.


Then I painted up four missile drones, two for each Broadside in my list.


Finally, I'm gathering lots of marker light drones. These are quite difficult to find: I managed to convert two with parts from the Broadside kit, combining those with drone bodies from regular suits, and then I used one from the stealth suit kit. I have another five or so to do before I have enough of them...


All the drones together!


Batman: Poison Ivy

$
0
0
Continuing my interest in the Batman: Arkham City miniatures game, I recently painted the Poison Ivy model. 

This was a very nice model to build and paint. It has some nice surface detail, and stretches your ability as a fine-detail painter (look at the vines/plants on her body - those required a steady hand and a very fine brush). The model has some real character, although I'm not such a fan of the Arkham Asylum/City version of Ivy - I'd prefer a more "classic" interpretation. That being said, Knight Models have actually released several versions of some Batman characters - so a further version can't be ruled out I guess!

I did find the individual parts quite "fiddly" for this model though. The head and arms (or at least one arm) are separate, but so small (probably a 3 mm across) that I couldn't pin them, so had to rely on superglue. 

Previous Knight Models figures have been very detailed but quite chunky - I already have DKR Bane, DKR Batman and Arkham City Batman, and all of these are substantial miniatures. Ivy has some quite thin arms and a very feminine outline.

I toyed with the idea of doing this model in flesh tones, maybe washing it back with green. I even considered going with a white undercoat, then washing with Thrakka Green (or the modern equivalent). In the end I thought bright greens over a black undercoat was best - there is a lot of definition in this model, so I think it worked out well.  


I added some foliage and static grass to the base, which adds to Ivy's plant-like nature. The figure already comes with a metal plant as part of the slotta base.


A close-up on the face - note that the hair has more highlighting than appears on this photo. For some reason the reds and browns have washed out here.


What's next for the Batman collection? I've just bought (another!) Batman (Arkham Origins version), and also the Silk Spectre II - hoping to get working on those in next few weeks...

Warforge: Alicia von Gaut

$
0
0

Warforge produces a couple of great sic-fi miniatures, suitable for use in 40k. This company has really nailed the 40k Gothic aesthetic, and when their female commissar was released I was very eager to paint some of their models. Then came the Alicia von Gaut miniature, and I knew that I had to buy one. 

This is a 28/30mm scale miniature, available in either resin or metal. I went with metal, and I'm glad I did. The scale is perfect for Warhammer 40,000 but be aware that the figure is quite slender - I would be wary of breaking it in resin (especially the haft of her mace). 

It is supplied in several pieces - the main body, the head, the hair, two separate arms, and the resin base. The latter is a nice touch!

I based on colour scheme on the Warforge website, but made some changes - opting for more red and white, and going with auburn hair over blue. The red was done with my new favourite layer combination: Mephiston Red, washed with Carroburg Crimson, layered with Evil Sunz Scarlett, highlighted with Wild Rider Red. 


The arms were unusually annoying to attach. They are such thin pieces that they cannot be pinned, and instead I relied on superglue. It took some filing and repeated gluing to get them to stay in place.

Alicia also wears some fetching plate mail leg greaves, but also comes with a larger pleated skirt piece. This looks quite Victorian in aspect, and can be attached to her back. I chose to leave this off.


Note that the feet needed a little work. I added some pins to the feet, creating pseudo heels. This allowed the model to stand properly and also created some appropriate detail for the legs and shoes.

The most obvious use for such a figure is as a female inquisitor, either in an Inquisition or Grey Knights army. Here she is with some second edition Stormtroopers - standing quite tall, but definitely in scale.


I also took a scale shot, to demonstrate her height and proportions. From left to right: Alicia (Warforge), Stormtrooper (GW), mutant ganger (Mongoose), cultist (GW), zombie (Hasslefree). She scales up fine to the GW figures (remembering that she has a slightly elevated base and posture), but would struggle against Hasslefree I think.


Gang Wars from Shapeways: Gun Girls in Trenchcoats (aka Necromunda Delaque)

$
0
0
A while ago, I placed an order with Shapeways for a number of interesting conversion bits and figures. Whilst some of these turned out to be not as interesting as useful as I would have hoped (the female Space Marine conversion set was just too much work!), I was really impressed by the Gang Wars female gangster set. 

I forgot to take a picture of the models as they came, but they were basically crisp, semi-transparent resin/plastic. They are one-piece sculpts, and fit slottabases easily. They take superglue well. 


They had no clean up at all, but did have a slightly pitted/rough finish on set smoother areas of the model. This was frustrating to ry to remove, and in the end I just sprayed a decent undercoat to try to get rid of the imperfections. The models took Halfords spray paint well.

And here is the end result...


I dropped this model during painting, and broke off the outstretched arm. Note that these models are very delicate - the plastic is quite brittle. They would be fine for general gaming though, and I reattached the arm easily enough.


The sculpting to the face is a little rough - the features are quite minimal, but again as gaming figures these do fine. All of the models have lots of nice little details such as pouches, belts etc.


Probably my least favourite of the three miniatures, due to the pose, but I still like it.


For scale, I also took this shot - as you can see, the sculpts are quite slender but fit well with 28/30mm scale models. Understandably, the Space Marine Scout towers of them.


The Gang Wars webshop can be found on Shapeways. These models aren't available in their current incarnation any more, but a newer, chunkier version is - check it out here.

Hasselfree: Morgan

$
0
0
Very small update today! I was recently asked to paint a number of "special agent" type figures, from a variety of manufacturers, and I have just finished one of these: "Morgan" from Hasselfree.

Hasslefree has a huge range of quality miniatures, from sci-fi to fantasy - if you are ever in a painting rut, then check out these guys. They are a really nice company and always have something to test your painting skills!

Morgan is a nicely detailed real world model - suitable for use jun sci-fi or modern espionage types scenarios. 


I chose two complementary colours for the clothing, and as I was only painting a few models I really highlighted these up to pastel colours. I did the same with the hair - the pale colour palette worked out well.


For scale, here is the model alongside Mongoose's Psi Judge and a GW Chaos Cultist. Morgan is naturally a small statured figure, but note that Hasslefree models are also quite slender in proportion (28mm scale, but nowhere near as heroic as some manufacturers).


Hivefleet Behemoth: Tyranid Haruspex

$
0
0
Codex: Tyranids was released a few weeks back, and the dust has begun to settle. Some commentators have moved away from the initial criticisms of the book, but I remain stalwart that this is a serious step backwards for the Tyranids...

However, I was impressed with the new Haruspex model and when I saw it I immediately wanted to get one. Several weeks of delay from my regular miniatures supplier, and it finally arrived last week. I got started, and set most of my hobby time over the past ten days or so working on it.

The Haruspex is certainly one of the larger Tyranid beasts, not as bulky as the Tervigon but much larger than a Tyrant or Carnifex. It'll look suitably imposing on the battlefield.

I painted this miniature in the same colour scheme as my existing army (see my analysis of the Codex for my decision to keep my old army!), and overall I think that the Behemoth scheme fits this beast well.


First impressions on this plastic kit were actually mixed... The model is formidable, yes, and goes together nicely, but there are virtually no extras in the entire kit. As it retails for £44, I was disappointed by this. Yes, it does make an Exocrine as well, but if I only want to make a Haruspex, then these parts are wasted! This is a real weakness in GW's current policy of making "dual build" kits, in my view - you end up with a pile of potentially wasted parts, which you have to pay for in the box price. I would have liked to see some adrenal glans, some extra spikes, etc - the older plastic Tyranid kits came with these parts, but the current thinking seems to be moving away from these optional extras.

Secondly, the detailing is quite "shallow". This has always been a problem with 'Nid plastics, but is quite pronounced on this model. Don't get me wrong, I do like it - but differentiating a claw or talon from surrounding flesh wasn't easy. The box picture shows some exquisite blending on the claws (going from bone white through to deep purples), but for most hobbyists this is going to be too difficult to achieve.


All that said, the mouth has a lot of nice detailing going on. The head and claws are the only parts that differentiate the Exocrine from the Haruspex, so it would probably be possible to attached magnets and interchange the parts. I was surprised by the limited differences between the beasts!


The red was achieved simply and effectively:

1. Spray entire model with Mephiston Red (use masking tape to cover black carapace and claws);
2. Wash red areas with Carroburg Crimson (this is such a nice deep red wash!);
3. Use a "wet" dry brush to pick out detail on flesh areas, with Evil Sunz Scarlet;
4. Use same method but very lightly applied, with Will Rider Red (be careful not to overdo this, as Rider Red is very orange);
5. Apply a careful and controlled glaze with Bloodletter, drawing all colours together;
6. Apply Nuln Oil to skin "vents".

This could also be achieved by careful brush application, but I always think that organic tones on 'Nids look nice dry brushed. The actual red is a bit deeper than it appears in these photos - red is quite a tough colour to effectively photograph with my set-up!


I found an interesting use for Nihilakh Oxide! The vents in the carapace armour received a thin layer, which I think worked nicely as well. I am usually stumped as to how to paint these, so I might go back over my old monstrous creatures and do the same.


The mouth received a coat of Vallejo Water Effects - left to dry overnight - then the tongue and some inner teeth were painted with a thin layer of gloss varnish.


So, all in all a nice plastic kit and a good addition to the Tyranid range.

Batman MIniatures Game: "Arkham Origins" Batman

$
0
0
I'm a huge fan of the BMG, and recently picked up the newest version of Batman - "Arkham Origins". This figure represents a "Year One" level Batman, from 2013's Origins game. That received mixed reviews, but I quite liked it.

Origins Batman comes in four parts - the main body, the left leg, and both forearms. He is cast in soft white metal and comes with a plastic base.

I decided to paint him in a rougher, more weathered way: I already have two "showroom ready" versions of Batman, so wanted to do something a little different. This reflects his appearance in the game as well - by the end, he's looking pretty battered...


The under suit was painted with GW's old Charadon Granite - a really nice mixed grey/brown. Sadly, there's no replacement in the current range. I highlighted the suit with increasing amounts of Dawnstone, then Administratum Grey.


The black armour portions were done with Mechanicus Grey, Dawnstone then Administratum Grey.


I would have liked the cape to appear a bit more ragged - this again would have reflected the appearance in the game. Nonetheless, it is nicely sculpted and has a good impression of movement.


I added weathering with Ironbreaker, and a tiny sponge (held in tweezers) loaded with Rhionox Hide - added barely visible chipping to the under suit.

The most difficult part of the model was the face. This is hardly visible, but for some reason the detail just didn't seem to pop up. I couldn't get the mouth to look "snarling" as it does on the blister, and so settled on the grimace we have here. The flesh tones were very slightly greyed, to suggest stubble. I could've gone further with this, but I was concerned that the chin would "merge" with the black/grey tones elsewhere on the model.


Batman Miniatures Game: Silk Spectre II from Watchmen - and some re-photography!

$
0
0
Another Batman figure today!

Knight Models produce some Watchmen figures for their Batman game. I'm a great fan of the movie and comic book, so decided to paint this faction up as well.

Another great model to paint, which came together very easily. Laurie comes as a main body, two forearms, and a head, as well as a plastic base. The parts went together no problems.

I went with a deep blue/black instead of real black. Highlights were achieved by adding the old GW Space Wolf Grey with Dawnstone and Administratum Grey.


Meanwhile, the yellow portions of the costume were painted with Tausept Ochre - a nice dull yellow, superb for blocking out over a black undercoat - with increasing amounts of Yriel Yellow. I felt that the end result nicely matched the Silk Spectre costume.


This shot demonstrates my only real complaint with this miniature: it is quite "flat". The other Knight Models figures I have are really dynamic, even if in static poses. This figure is obviously in an action pose, but appears flat side-on.


The hair was quite challenging. I eventually used Rhinox Hide as a base, adding Gorthor Brown, then mixing in a little Kommando Khaki (an older paint). I then carefully washed back the highlights with Agrax Earthshade.


I also got a comment from a reader a while ago that they disliked the red backgrounds on some of my earlier Batman photos! What can I say: it was an experiment that went wrong... So I re-shot some of my earlier figures, and they are shown below.


Finally, here is a "usual suspects" shot of my collection so far - note Bane's imposing stature, as well as the Dark Knight's height.


I think I have enough Batmen for now, but hoping to paint up Ras al Ghul or some Gotham cops in the near future...

Review: Judge Dredd Miniatures Game from Mongoose Games

$
0
0
I've posted a few Judge Dredd miniatures since Christmas, and today I'm going to be reviewing the core rulebook.


Firstly, I think that this is a great product! The whole book is a joy to read. Weighing in at 240 pages, in large format, and hard backed - it's a lovely item to own and look through, even if you never play the game. It is richly illustrated with art  from the comic books, as well as some lovely painted miniatures throughout. Mongoose definitely has the right idea about presenting nice examples of their figures, and their studio painter is excellent.

The book covers simple and advanced rules, then campaign play, and finally some fluff/background. The basic premise is that you pick a gang type (from Judges, to Demonic Cabal, to Sky Surfers), and engage in a small scale skirmish. There are various missions and objectives detailed in the book.

The game mechanics are simple and easy to master. It's a basic gang war, I-go-you-go affair - nothing groundbreaking in terms of dynamics. But the rules do feel very Judge Dredd: with special actions allowing arrests, hiding, etc. Overall, very easy to learn but definitely geared towards "beer and pretzels" type play. The whole thing feels very early Rogue Trader, but with much better presentation. It's a nice break from 6th edition 40k, where the rules seem to have become so bloated that it takes forever to get through a game....

Heroes deserve a separate mention. They have "talents" - special skills which separate them from minions. The talents add an interesting extra dimension to the game, although I found finding them in the rules cumbersome at times (especially for experienced heroes like senior judges: they quickly acquire a huge range of skills).

A point worth making about Judge Dredd is that it is very much a skirmish level game. A starting Judge gang might have 3 figures, whereas a gang of Cursed Earth Desperadoes may have half a dozen to ten. Every figure really counts!

A mixed observation is the introduction of mercenaries. I found this mechanic unusual, and it might well reflect the manner in which Mongoose intends to expand the game.  As noted, you start by picking a gang. This gang then has access to "reinforcements" - usually a long list of extras figures, often with more exotic weaponry and equipment. The idea is that when your gang faces another, bigger gang, you can induct the difference between credit values for the gangs but in mercenaries. These mercenaries can't gain experience, but otherwise act as part of your gang. The difficulty with this approach is that certain miniatures seem to be core gang members for some gangs, then mercenaries for others, and the decision as to who is a gang member and a merc is pretty arbitrary. Some mercs are really just typical gang members but with particular talents or weapons. However, the benefit of doing it this way, I suppose, is that Mongoose can release figures on an ad hoc basis: there are already lots of PDF files on their website, and I could easily see new characters being made available in this way.

Finally, we come to the price. This can be a deal breaker for may war gamers, especially with companies really upping their prices recently. I certainly found the price of £30 for this product very reasonable - it's such a nice book, that I could justify the price. Even better, many websites have it on a discount - Amazon lists it for £22, for instance.

Overall, Judge Dredd: The Miniatures Game is highly recommended!

Imperial Knights: Inbound tomorrow....

$
0
0
Tomorrow is the release of the newest big plastic kit for 40k - the Imperial Knight!

We've gone from this in Epic...


To this in 40k...


So, will you be buying an Imperial Knight? I really like the model but think that the codex is a wasted opportunity to introduce a proper new army... I'll definitely be buying a knight, but not from GW: the discounts on this bad boy are huge at Wayland Games, Darksphere and Total Wargamer (if you can stomach the inevitable weeks-on-end delay of ordering from them!!).

Such little painting time this week, but finishing up a couple of commissions which I hope to post next week.

Quick Cadians: Female Troopers

$
0
0
Today I finished a small commission project, using a variety of bits from third party manufacturers. The models hopefully showcase how the various parts can be used.

I was asked to do a tabletop squad of these models, in the standard Cadian colour scheme. This has gone through a number of variations over the years (especially with the release of the new paints), so I went for the typical scheme used in the "How to Paint Citadel Miniatures" guide.

The most interesting aspect of this project was that my client wanted an all-female squad! Here are the finished models:


The miniatures are obviously based on the standard Cadian sprue from GW; I used the legs, arms and weapons. I combined these with the "female conversion set" from Shadowforge miniatures (the Laughing Monk range). A quick look online suggests that these might no longer be available, but I could be wrong about that.

The set originally included a variety of replacement torsos and heads, to convert a whole squad of troopers. The torsos are generally nice and useable, but the heads were less so. I picked the best ones, and combined these with a sprue of female heads from Microart Studios. Again, unfortunately, a quick search online suggests that these are now discontinued - they look to have disappeared following the MAS split last year!


This model shows a torso and head - I guess with the plastic longboat legs, these parts would make a decent female commissar as well.


This miniature demonstrates a Microart Studios head. These heads are very well sculpted - good expressions, excellent detail and fun to paint. They are much better than the Shadowforge heads, and the scale is about right.


These two troopers demonstrate the original Shadowforge heads. As can be seen, the detail is cruder and almost "elvish" (or Eldar!). The berets were the nicest of the bunch; also included were some heads in cloth caps, some in Naval caps, and some bare heads. Interestingly, the set also included some "half-heads" which could be glued in to the plastic Cadian helmet... That sounds like a good idea, but in reality the helmet looks enormous and the bits just didn't work together.


This trooper has a Shadowforge torso and a MAS head.


Same again head.

Overall, I'd definitely recommend searching out these bits if you want to build a female Guard squad. If you're a true infantry head, then any variation in your stock troops has to be a good thing. I question why GW doesn't just make a head or two for the Cadian squad...

Trollforged Miniatures: Imperial Greatcoat Commander

$
0
0
Trollforged Miniatures was undoubtedly the forerunner in casting of community-sculpted models, and continues to release a series of interesting and unique miniatures. A while ago I picked up this model, and recently finished painting him.

This is a Greatcoat Platoon Commander, released as part of Trollforged's Greatcoat range. These are bearskin-hat-wearing, rifle-toting sci-fi troopers - similar to but not the same as GW's Vostroyans. I haven't purchased any of those, but the Platoon Commander appealed to me because he has so many uses in other games. I painted him in regal, deep reds, but plan on using him as a Primaris Psyker in 40k. He'd be ideal for use as a commander in an Imperial Guard army as well - Vostroyans immediately come to mind, but would make a good Cadian general in the right colour scheme. 

The model is single piece, cast from super light resin. The sculpting is perhaps cruder than some manufacturers, but the model is very cheap and I like the character. 


The face in particular has nice detail, and the chunky sculpting takes painting and subsequent highlighting very well.

The shot below shows the detailing on the cape, providing plenty of opportunity to add highlights.


Tutorial: Painting digital camouflage on a Tau Devilfish - part 1

$
0
0
A while ago, I bought an interesting new product called Mask FX from Critical Mass Games - available here. Available as standard digi-camo, or now a variety of other cap types, this product is marketed as a quick and easy way to apply camo with spay cans or airbrushes. I decided to try this out, and over the next few days I'm going to be posting a tutorial on applying digi-camo.

The product really works! I'd highly recommend it! I actually wanted to do something like this on some armour portions of an Imperial Knight, but decided to try out the technique on a Devilfish before hand. My aim was to paint up a really dirty, very weathered transport; I wanted the camo to look sharp, but also hastily applied.

Using this masking product is all about planning. It's important to plot out hat colours you will use, and the order in which they will be applied. I wanted a mainly grey-blue tank, so worked that as my primary colour.

Stage 1: Undercoat
I started, unusually, with a white undercoat. Nice and solid, applied with several loose and thin coats.

Nothing to see here - move along...

Stage 2: Apply mask
Next, I broke open the Mask FX and some tweezers.


The tape comes on a backing plastic, and you simply pull it off and apply to your model. Be careful not to damage the tape, although it is quite durable. Make sure that you apply it with some pressure to your model - especially if you have curved armour sections etc.


Here's the model as it should look. Note how only the taped sections will end up being white - an example of carefully applying colours. The finished model will actually have little white on it, only the taped sections.

Stage 3: Spray second colour
I simply sprayed my model again, with the next colour of choice (in this case, a flat grey).


I actually used spray cans for this project, but it would work much better with an airbrush. It's basically too cold in my area of England at the moment to use my airbrush outside, so I went with what was at hand!

Once this is dry, go back to the Mask FX and apply more tape pieces to the model. Only those parts left concealed beneath the tapes will be left grey.

Note that the underside of the tank was left white. This was deliberate: I liked the idea of weathering up the white, and leave it like the underside of an aircraft (commonly left white).


Stage 4: Last colour coat
The third and final shade is then applied - in my case, Army Painter Wolf Grey.


Stage 5: Remove the tape
Let your model dry! This is important, as otherwise the tapes might left off some of the paint. This is especially crucial if your using spray cans...


I would suggest tweezers are again the best option. The Mask FX should just peel off with little resistance!

You'll be left with something like this...


Note that you will probably have some errors after the tapes are removed. If your chosen vehicle has curved armour plates, like this Devilfish, this might be quite pronounced. This is easily fixed by going back over your camo and touching up mistakes with a brush.

Next instalment: adding shading with a wash...

Tutorial: Painting digital camouflage on a Tau Devilfish - part 2

$
0
0
Stage 6: Apply varnish
Do a quick pass over your model with a satin or gloss varnish - this will protect your paint job and help the wash in the next stage...

Stage 7: Apply a wash
There are lots of ways this could be done - I'm a big fan of Citadel Shades, for example, but wanted to try something darker for this project. On large tanks like this, I like to use MIG Productions "Dark Wash".

This is an enamel wash. Simply load up your brush, and set it to the grooves and recessed parts of the model. The wash flows right off of your brush, and into the detail. This can be messy, but you will be left with something like this:


Remember to wash your brushes well after using this wash - it will ruin expensive brushes, so use something cheap for this part. 

Stage 8: Clean up wash
This stage demonstrates another nice quality of the MIG enamel washes. You will need some thinner - I recommend MIG "Thinner for Washes."

Take a piece of sponge (from a blister pack is fine), and dab it into the wash. I use the inside of the thinner bottle, as the thinner evaporates really quickly. Using the sponge, wipe the exposed armour plates. This will leave the shading in the recesses, whilst removing the excess wash. A side effect is that it also stains the whole model, giving you a weathered and dirty overall look.


Next up: the finished model...

Tutorial: Painting digital camouflage on a Tau Devilfish - part 3

$
0
0
Stage 9:Paint fine details
I confess that I forgot to photo this stage! But it's easy to describe: apply any decals, via your chosen method. Paint small details like glass view ports etc.

Stage 10: Apply chipping
This is a fun and easy stage! I used a sponge to apply small chips across the model. Basically, take a dark(er) colour and dip a small piece of sponge into it. Using tweezers, dab this across your model.

I used Rhinox Brown, and went further by highlighting the chips. Take a lighter colour than your base coat, and a detail brush. Paint the underside of each chip to simulate depth.

This stage can be skipped if you are in a rush!

Stage 11: Apply weathering powder
With weathering powders, it's important to apply them in the appropriate order, and to build up layers. Don't use huge amounts and then be surprised when the model looks unreal. It's better to build them up with various colours, carefully, using multiple fixative coats as well.

I prefer MIG weathering powders. I applied powders to the exhaust vents and other areas that would generate heat. I sealed those areas with a dab of MIG "Pigment Fixer".

Then I went round the model again, applying more weathering powder - mainly to the underside but all areas which would attract dirt. Again, I fixed this.

Stage 12: Seal with varnish
Seal the model again with another thin coat of varnish. This will protect the wash we applied earlier, and also the weathering powders - if you game with your models, these are very prone to coming off if you don't seal them properly.

Here is the finished model...


I inverted the colours on the engines, to add some variety. Note the heavy staining on these parts.


Metallic parts were painted with a dry brush of Necron Compound, followed by a heavy wash of Nuln Oil; this creates a really dark metal.


I will be adding the drones later...

 The rear of the vehicle - both heavily chipped and weathered...


This shot shows the underside. In applying the weathering powders, I did so directionally: simulating the movement of dust and grit as the Devilfish hovers.

That's it for now - a fast and easy way to paint weathered tanks and vehicles!


On the workbench: Imperial Knight

$
0
0
There is a reason for my absence from blogging - firstly, my day job has been busy and painting time has been at a minimum... But secondly, these pictures should say the rest...


I've started the first stage of my Imperial Knight! It's a whole lot of plastic, and a whole lot of work, but I think it's coming together nicely. The skeleton is nearing completion, and as you can see I've made a base for it as well.


I'm going with a fairly typical "box art" approach, but with my own spin so far as weathering and extras goes. This is going to be a heavily worn, very well used, Knight!

Finished Imperial Knight: House Terryn

$
0
0
Hopefully the reason for my lack of updates in the last couple of weeks will now become clear...

I've been building and painting an Imperial Knight! This has been a whole heap of work...!

I decided to go with House Terryn - the most common GW scheme - because I haven't used the darker GW blues so far and liked the red and blue interplay. It was a choice between Terryn or a free blade in the end, but I couldn't stomach the additional cost for the transfer sheet!


I was initially going to use an airbrush on the metal skeleton and armour plates, but eventually went with standard brush work. The model is just about manageable with a brush, but keep your paints diluted and do multiple layers. I actually used Army Painter Platemail on the metallic parts, because it takes washes so nicely and highlights well with a dry brush of Necron Compound.


I added weathering all over the model. The gold was weathered with Runefang Steel, and all exposed areas were treated with MIG weathering compounds. I especially added pigment to the feet and the banner - this would be totally drenched in mud in reality...


The battle cannon was treated with black soot and other brown pigments, and has a kill-sign on the base of the barrel.


I used Tamiya masking tape to achieve the stripes of the shoulder - it was easy to do, and I added chipping with a sponge. Worked well!


Here's the upper carapace. I added lots of weathering here, but in a different style to the lower portion. Here, the paint is chipped and fluid has dripped from pipework. The ladder rungs are chipped and rusted in places.


The huge chain blade - note the weathered arm sections. I used the new Tyhus Corrosion in places - this is a nice semi-wash paint, which looks good against silvery metals.


The back of the model highlights the weathered metallics. Note the extra resin pieces of the base - taken from the old Planetfall resin objectives set.


A close-up of the legs - some metalwork was picked out with Runefang where it would naturally be exposed.


Another view of the battelcannon. The kit comes with a very nice A3 transfer set - these era high quality, easy to use and have lots of variety. The main Knight Houses are covered. I found it easy to apply even the larger decals on the legs and shoulder pads, then used Vallejo Decal Finish to seal them (a great product). Chipping was done with a sponge.


The metalwork of the battle cannon arm.


Another view of the banner, listing the Knight's many battle honours.


Another view of the head - the eyes are just visible under the mask.


The shoulders - note the very weathered striping and battered gold effect. I used Vallejo Liquid Gold (Old Gold) on all gold portions, but on very large areas it can look a little unnatural with just a wash, so I added silver chipping.


Finally, here's a view alongside the Riptide and Nemesis Dreadknight - highlighting the enormous bulk of the model. This kit was a lot of work, but I really enjoyed it. The process was a bit of an endurance test at times, but a logical work attitude yields good results.

Is it worth £85 from a GW retail store? Probably not. The Riptide is £45, and just check out the difference in size. I wouldn't pay retail for one, but there are plenty of online stores with deals on these models. Check out Darksphere for a decent price and reliable service.

What's next? I'm going to do a piece on my Imperial Guard, aka Astra Militarum, army soon. Looking forward to the new codex, even if it will have some changes. Also have a large Tyranid commission from a loyal client of mine - expect some posts on that very soon as well...


Salute 2014

$
0
0
So, yesterday was the annual war-games show at Excel, London - Salute 2014.

I always try to go along to the show, to check out items that I normally wouldn't pick up or be aware of. This year seemed to be really well attended, both with visitors and with sellers. There were lots of demonstration games going on, lots of really nicely painted miniatures and some good deals for buyers as well.

It's shows like this that often remind us there is more to the war-games hobby than just Games Workshop... I was surprised this year to find that GW chose not to attend the show at all, and even Forgeworld appeared to have a reduced presence (mainly selling T-shirts, mugs and posters with items available for order). However, there was a huge range of independent games being showcased, with developers like Mongoose Publishing and Mantic in attendance. I managed to pick up some more Batman models (lots of sellers for Knight Models, which was nice as I don't know anywhere local to me that sells them), some Judge Dredd figures and a couple of Blightwheel miniatures. I'm certainly looking forward to painting the latter: unclose, the detail is awesome: I particularly wanted a Squire model as an objective piece for my newly-finished Imperial Knight.

The stand-out stall for me, however, was Prodos Games - developers of the new Aliens vs Predator board game and war-game. I chatted with some of the team, and they were really open in terms of talking about the new game. There were several finished sculpts available for inspection.


I was really impressed by the Alien Crusher (from Colonial Marines) - it has a nice weight to it!

Sadly, the beautifully painted Predator shown to the left of the photo had been dropped by a visitor earlier in the day, and so the foot was broken!


Some personality figures can be seen to the right of the photo.


Further examples of Aliens and Predators... Note the awesome Queen in the background - I handled this sculpt, and was thoroughly impressed by the level of detail.


In the middle of this picture, you can see a Weyland-Yutani Commando.


Here is the Predator Berserker - Prodos showed me the model alongside one of the regular Predators, and the Berserker is suitably scaled to be even bigger than a regular warrior!

Prodos were also showcasing some updated token sets and the board tiles. They explained that these had been redone, as they were unhappy with the originals. The examples at the show were really amazing; very detailed, very colourful. It's great to see a company listening to customers, and acting on criticism or advice. Overall, I'm really looking forward to the release of this game and feel confident it is in safe hands!

After a long day of shopping at Salute, I managed to get a couple of games of 40k in. This is a rarity for me!


I played a 2000 Ravenwing list, combined with an allied Imperial Knight and a small Inquisitorial contingent.


Of two games I played against my regular opponent, I won one and lost one so not too shabby. If anyone has any tactical advice on how to play Ravenwing, and in particular on use of the Darkshroud, feel free to drop me a comment...
Viewing all 198 articles
Browse latest View live